Game Guides
Umamusume Pretty Derby Career Guide: Best Training Strategy for Beginners

Ashi Prasadi
|2026-07-27Hello to all Umamusume players. You’ve just pulled your first Umamusume, stared at the Career button, and now you might feel a mix of excitement and mild panic. Every turn matters, energy drops fast, rainbow training looks magical but mysterious, and the wrong support deck can turn a promising run into a string of second-place finishes. So, let’s deliver the exact training strategy that Umamusume beginners need to know with this this Umamusume Pretty Derby career guide. Let’s get to know clear career goals, understand every major career mode, and start building real legacies without wasting weeks of progress.
Understanding Umamusume Career Modes and Scenarios
Career mode is the heart of Umamusume Pretty Derby. You take one trainee through roughly three in-game years (Junior → Classic → Senior), complete mandatory goal races, manage energy and mood, raise stats through training facilities, and finish with the scenario’s final challenge. Each run produces a trained Umamusume that can later serve as a legacy (parent) for future careers, passing down sparks that boost starting stats and skills.
Several Umamusume career scenarios exist, each with unique mechanics layered on the core loop:
URA Finale — The original and most straightforward scenario. Fixed goal races, no extra gauges beyond friendship and facility levels. Perfect teaching tool.
Unity Cup — Introduces team unity training and Spirit Bursts that level facilities faster.
Trackblazer — Heavy on optional races and Result Points spent in a shop.
Grand Concert (Grand Live) — Newest as of mid-2026. Adds Performance Points, Lessons, Songs, and Concerts that grant massive stat bonuses when you hit song thresholds.

Umamusume best career scenario for pure beginners is almost always URA Finale. It teaches energy management, friendship training, and race selection without the extra systems that can overwhelm new players. Once you can clear URA Finale reliably and have two or three decent legacy parents, move to the others. Grand Concert offers the highest potential but is designed for players who already understand the basics.
Pre-Career Setup: The Decisions That Decide Your Run
Before the first turn in the Umamusume Pretty Derby career, three choices shape everything.
Choose the right trainee: Start with easy short- or mile-focused girls such as Sakura Bakushin O. Her career stays in Sprint/Mile distances where Speed alone carries most wins, and her unique skill rewards Front Runner positioning. Avoid long-distance specialists until you understand stamina thresholds.
Select legacies (parents): Borrow or use your own trained Umamusume that carry high-star blue sparks in Speed, Stamina, or Power matching the distance you want. Early on, any 2★ or 3★ Speed spark is valuable. Affinity (◎ or ○) helps but is secondary to raw spark stars for beginners.
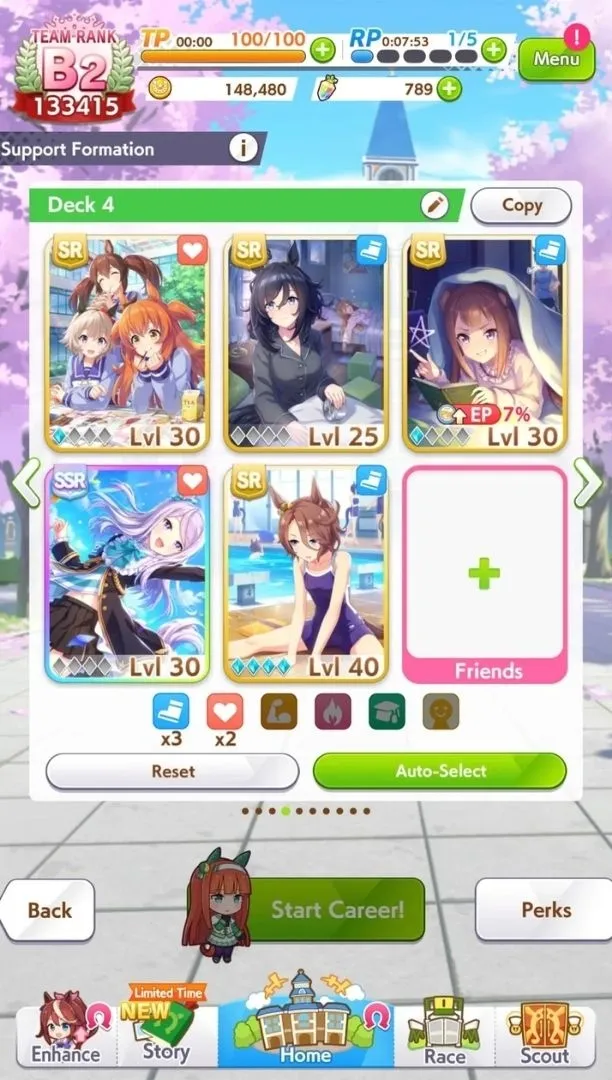
Build the support card deck: This is the single biggest lever. A strong beginner deck follows one rule: 3–4 Speed cards + 1–2 cards matching the secondary stat.
Distance Focus and Decks to be Used
|
Distance Focus |
Recommended Deck Composition |
Why It Works |
|
Sprint / Mile |
4 Speed + 1–2 Power |
Speed sets top speed; Power helps acceleration out of the gate |
|
Medium |
3–4 Speed + 2 Stamina |
Balanced endurance for 2000–2400 m races |
|
Long |
3 Speed + 2–3 Stamina + 1 Wit |
Stamina becomes the limiting factor |
Always include at least one card with good recovery skills (Super Creek is the classic example) and prioritize cards you have leveled. Friendship training multiplies gains dramatically once bonds hit 80.
The Core Training Loop Every Beginner Must Master
Every turn you choose one action: Train, Rest, Recreation, Race, or Infirmary. Success comes from ruthlessly prioritizing the right one.
Energy and Mood Management: Never train below ~30–40% energy. Failure chance spikes and you can lose stats or gain negative conditions. Wit training is the only facility that restores a little energy while still raising a useful stat. Recreation raises mood (aim for Great before important races and Summer Camp). Rest only when energy is critically low or you need a full recovery before a four-turn Summer Camp.
Friendship and Rainbow Training: This is the true power spike. Each support card has a friendship gauge. Training in the same facility as a support raises it by +7 (more with certain statuses). At 80 the gauge turns orange and that card can trigger Friendship Training (rainbow border). Multiple rainbow cards in one facility create enormous stat gains. Early Junior Year is almost entirely about raising bonds as fast as possible, even if it means training a slightly suboptimal facility.
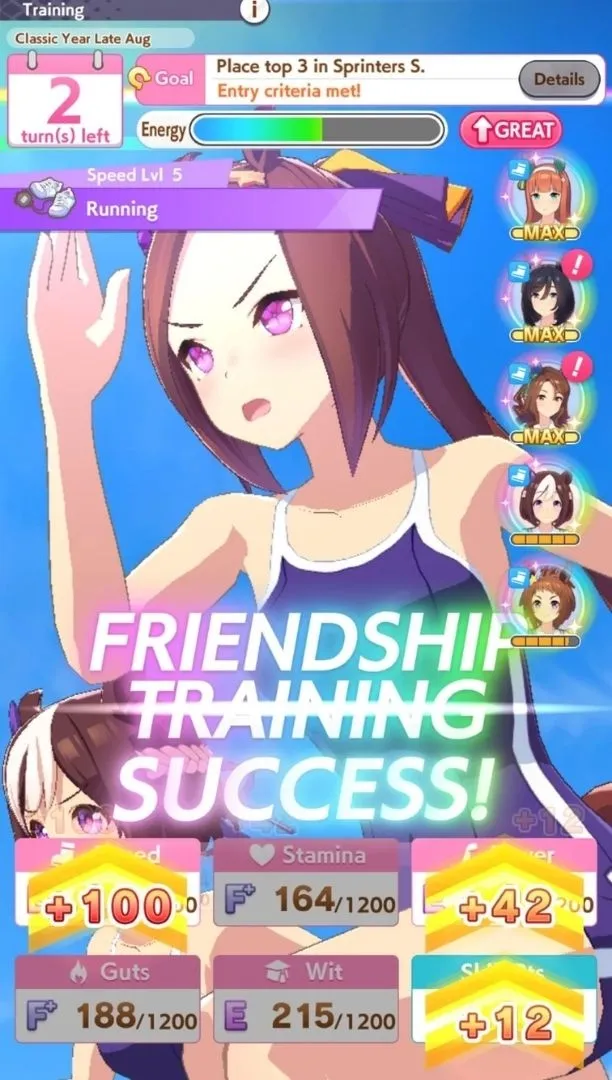
Facility Levels: Train the same facility four times to level it up. Higher levels give permanently better base stats for the rest of the run. Focus levels on the two stats your deck is built around.
Summer Camp: Early July to late August offers four turns of max-level facilities. Enter with full energy and Great mood. These turns are often the biggest single power spike of the entire career.
Stat Priority Targets by Distance
If you are struggling, now you can use these as realistic mid-to-late career goals for a successful beginner URA Finale clear. Higher is better once you have strong legacies and cards.
|
Distance |
Speed |
Stamina |
Power |
Wit |
Notes |
|
Sprint (≤1400 m) |
800–900+ |
250–350 |
450–700 |
300+ |
Power helps early acceleration |
|
Mile (1600–1800 m) |
700–850 |
350–450 |
450–700 |
300+ |
Balanced but still Speed-heavy |
|
Medium (2000–2400 m) |
750–800 |
500–650 |
400–500 |
320+ |
Stamina becomes critical |
|
Long (2500 m+) |
700+ |
600–700+ |
300–500 |
400+ |
Stamina first, then Speed |
Please note that the guts is almost never worth dedicated training for beginners and the game applies a hidden bonus that makes it less necessary.
Year-by-Year Training Strategy
Junior Year:
Prioritize bond raising above pure stats.
Hit mandatory goals (often fan thresholds or early stakes).
Use optional G1 races only when energy and mood are healthy and the distance matches your aptitude.
End the year with most support cards at or near orange friendship.
Classic Year:
Rainbow training becomes available. Always take it when it appears.
Prepare energy for Summer Camp.
First Inspiration event appears in Early April—choose options that match your secondary stat needs.
Start accumulating skill points for gold skills later.
Senior Year:
Push remaining stats hard.
Complete fan thresholds for unique skill level-ups (Valentine’s, Fan Fest, Holiday events).
Save Alarm Clocks for the final URA Finale races if needed.
Enter the three-race URA Finale sequence with the highest possible energy and mood.
Managing Umamusume Career Races
Mandatory goal races must be completed (or retried with Alarm Clocks). Optional races give fans, skill points, and small stats but cost a turn and energy. Rule of thumb for beginners: race only when
the distance and surface match your aptitude,
energy is above 50%,
mood is Good or Great, and
you still need fans for the next goal or skill points.
Skipping races is often correct early on so you can keep training.
Essential Tools: Uma Musume Career Helper and Career Calculator
Modern trainers use external helpers to remove guesswork. The most popular options among them include:
Dedicated Umamusume career calculator sites that project final stats from current numbers, support cards, and remaining turns.
Deck builders and support comparators that show combined friendship bonuses and skill hints.
Stamina checkers that tell you exact thresholds for Front Runner vs Late Surger on specific tracks.
Scenario-specific planners (especially useful once you reach the Grand Concert).
These tools turn “I think this is good enough” into “I know I need 80 more Stamina before the Arima Kinen.” Bookmark one or two reliable ones and check them before important races.
Hot Recommend
Download LDPLAYER, play Umamusume: Pretty Derby on PC, enhance your gaming experience!


People Also Ask
What is the easiest Umamusume for beginners to clear career mode with?
Sakura Bakushin O is the one. Her career stays in Sprint and Mile races, her Speed growth rate is excellent, and Front Runner style plus her unique skill make wins far more consistent while you learn the systems.
Should beginners start with Grand Concert or stick to URA Finale?
Stick to URA Finale for the first several runs. Grand Concert adds Performance Points, Songs, and Concert thresholds that assume you already understand friendship training, energy, and basic race selection. Master the core loop first.
How many optional races should a beginner run in one career?
Usually it is 8–15 total, focused on G1 or G2 races that match aptitude and give useful fans or skill points. More than that often wastes turns better spent on rainbow training or facility leveling.
Conclusion
So, it is time to follow this structure and your first successful career clear will feel inevitable rather than lucky. Then the real fun begins: optimizing for higher ratings, farming specific sparks, and eventually tackling the more complex Umamusume career scenarios with confidence. The track is waiting so go train those horse girls while claiming your Umamusume Pretty Derby codes as well.
More from Umamusume Pretty Derby:
Umamusume Pretty Derby Winning Ticket Build Guide