Rainbow Six Mobile Maps - All Locations in 2026
Ashi Prasadi
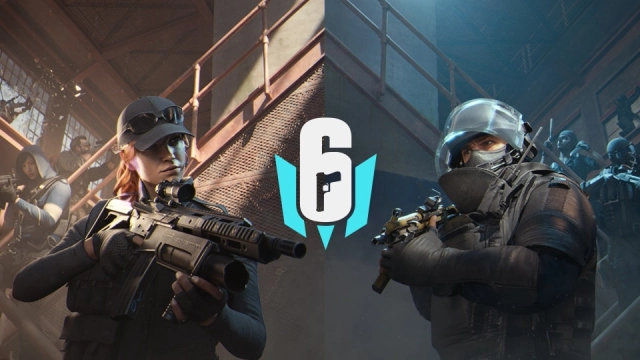
|2026-02-22In Rainbow Six Mobile, maps quietly decide most rounds long before the final gunfight. Once you understand where teams usually clash, which areas control the pace, and how rotations naturally flow, the game starts to feel slower and more manageable. This Rainbow Six Mobile map guide focuses on the spots that actually matter, the mistakes that cost rounds, and the positioning habits that consistently lead to wins consistently across all Rainbow Six Mobile maps.
Contents

Why Maps Matter More Than Aim
In Rainbow Six Mobile, strong aim helps, but for a Rainbow Six Mobile Beginner, it’s rarely the reason rounds are won consistently. Matches are usually decided by positioning, knowing where angles are dangerous, and how teams naturally move once pressure builds. When you understand the layout, the game feels less chaotic and more predictable, even in high pressure moments.
This is where Rainbow Six Mobile maps make the real difference. Learning which walls matter, where rotations save time, and where players tend to hesitate or overextend gives you an advantage that aim alone can’t replace. Once map awareness clicks, you stop chasing kills and start controlling rounds and that’s when wins begin to stack up.
Launch Maps
At launch, Rainbow Six Mobile offers a compact but well-balanced map pool that’s easy to learn without feeling repetitive. The selection mixes familiar Siege locations with brand new mobile exclusives, giving both veterans and new players something to enjoy. Every map is tuned for shorter rounds and smoother flow, so you’re always getting into meaningful fights without long downtime.

Maps Overview
- Total maps at launch: 7
- Siege adaptations: 5 classic maps reworked for mobile pacing
- Mobile exclusives: 2 maps designed specifically for touch controls
- Supported modes: Quick Match and Ranked (Bomb mode on most maps), with select maps available for casual modes like TDM
How to Learn Rainbow Six Mobile Maps
Understanding Rainbow Six Mobile is about knowing the battlefield. Each map has spots that decide rounds, rotations that separate good plays from bad ones, and destructible areas that can completely swing an attack or defense. By learning Rainbow Six Mobile maps step by step, you can start controlling rounds and making smarter decisions without feeling overwhelmed.
- Get the Overview – See the map layout, note if it’s a Siege adaptation or mobile-exclusive, and understand the flow from attacker spawns to defender strongholds.
- Identify Key Areas – Focus on high-traffic rooms, choke points, and spots that decide most rounds.
- Study Bomb Sites/Objectives – Learn which areas attackers prioritize and how defenders
- usually hold them.
- Master Destructible Play – Know which walls, floors, and hatches matter for breaches or reinforcement.
- Practice Attacker & Defender Strategies – Learn common push routes, gadget usage, and rotation patterns.
- Learn Common Mistakes – Avoid overpeeks, ignored rotations, and leave key walls soft.
- Apply Pro Tips – Incorporate small tricks that give you an edge in positioning, map control, and round outcomes.
Map Breakdown - Understanding Flow and Key Spots
Every Rainbow Six Mobile map has a rhythm. There are high traffic zones where rounds are usually decided, areas that favor attackers or defenders, and destructible surfaces that can completely change the pace. Learning the flow and key spots first helps you approach each map strategically rather than reacting blindly.
Bank - Classic Siege Adaptation
Bank is a map where controlling the vault and surrounding areas often decides the round. Even on mobile, the multi-level layout rewards players who think strategically, manage vertical rotations, and hold key sightlines.

|
Map Details |
Information |
|
Key Areas |
Vault, Gold, Server Room, Lobby |
|
Bomb Sites |
A – Tellers/CCTV, B – Vault/Gold |
|
Destructible Play |
Vault hatches, 2F floors, soft walls for vertical pressure |
|
Attacker Strategy |
Drone early, push vault with hard breachers, use roof for intel |
|
Defender Strategy |
Reinforce vault, roam garage, hold lobby lines |
|
Pro Tips |
Listen for breach sounds, control sightlines early, coordinate rotations |
Border - Fast Paced Pressure Map
The border is tight and intense, with destructible walls and quick rotations keeping fights fast. Mobile tweaks make close quarters battles constant, so positioning and timing matter more than pure aim.

|
Map Details |
Information |
|
Key Areas |
Armory, Archives, Workshop, Customs |
|
Bomb Sites |
A – Armory/Archives, B – Tellers/Bathroom, C – Workshop/Vents |
|
Destructible Play |
Soft walls throughout, garage to customs |
|
Attacker Strategy |
Rappel 2F windows, coordinate soft wall pushes, gadget usage |
|
Defender Strategy |
Rein archives, roam garage, hold Castle windows |
|
Pro Tips |
Drone key zones, control vents, maintain map pressure |
Clubhouse - Vertical and Tactical
Clubhouse emphasizes basement control and vertical dominance. Garage walls and tunnels often decide rounds, so teamwork and timing beat solo flashy plays every time.

|
Map Details |
Information |
|
Key Areas |
Armory/Church, Garage, Bar/Stage |
|
Destructible Play |
Garage wall, basement hatches |
|
Attacker Strategy |
Use Maverick/Thermite on garage or armory walls, push tunnels |
|
Defender Strategy |
Anchor garage, roam basement or 1F |
|
Pro Tips |
Garage control often wins rounds, coordinate pushes carefully |
Oregon - Spacious & Methodical
Oregon rewards structured pushes and map awareness. Long sightlines and wood floors allow vertical play to make a big difference, putting strategic positioning above raw aim.

|
Map Details |
Information |
|
Key Areas |
Basement Laundry/Dining, 1F Kitchen/Dorms, Tower |
|
Bomb Sites |
A – Laundry/Dining, B – Dorms/Kids Castle |
|
Destructible Play |
Wood walls and floors, tower hatches |
|
Attacker Strategy |
Control attic/tower, soft walls with Zofia or Buck |
|
Defender Strategy |
Anchor basement, deny vertical pushes |
|
Pro Tips |
Watch rotations, control sightlines, manage vertical pressure |
Villa - Vertical Warfare
Villa is all about vertical pressure. Floors are constantly contested, with 90 Hallway serving as a key anchor point. Attackers and defenders need map knowledge to predict movements and control engagements.

|
Map Details |
Information |
|
Key Areas |
1F Kitchen/Dining, 2F Aviator/Games, 90 Hallway |
|
Bomb Sites |
A – Kitchen/Dining, B – Aviator/Games |
|
Destructible Play |
1F wood floors, vault/study walls, Mira windows |
|
Attacker Strategy |
Floor breach from above, balcony rappels, vault push |
|
Defender Strategy |
Anchor 90 Hallway, control Games Room, roam Study |
|
Pro Tips |
Drone closets, listen for floor creaks, call out rotations early |
Summit - Mobile Exclusive CQC
Summit is designed for mobile tight corridors, vertical layers, and high destructibility make every round feel fast paced and tactical. It’s perfect for competitive play where positioning and utility timing matter most.

|
Map Details |
Information |
|
Key Areas |
Garage, Gym, Atrium, Glacier Suite |
|
Destructible Play |
High destructibility across most walls and floors |
|
Attacker Strategy |
Quick pushes, gadget control, vertical positioning |
|
Defender Strategy |
Anchor key choke points, deny utility, control rotations |
|
Pro Tips |
Stay mobile, use gadgets to delay pushes, hold corridors carefully |
Restaurant - Casual Mobile Exclusive
Restaurant is small and fast paced, designed for casual modes, TDM, and mainly 3v3 events. It’s perfect for practicing movement, flanking, and utility usage without the pressure of Ranked play.

|
Map Details |
Information |
|
Key Areas |
Dining Area, Kitchen, Bar |
|
Gameplay Style |
Fast skirmishes, high mobility, close-quarters combat |
|
Attacker Strategy |
Quick flanks, control tight spaces, use gadgets efficiently |
|
Defender Strategy |
Hold choke points, deny pushes, react quickly |
|
Pro Tips |
Great warm-up map, practice aim and positioning, learn mobile controls |
Best Maps for Beginners
When you’re just starting out in Rainbow Six Mobile, not all maps are created equal. Some maps, like Bank or Restaurant, are easier to learn because their layouts are straightforward and high traffic zones are predictable. These maps let you focus on learning rotations, key sightlines, and basic attacker or defender strategies without feeling overwhelmed by too many layers or vertical plays. Starting here gives you confidence and helps you understand the rhythm of Rainbow Six Mobile maps before diving into more complex layouts.
On the other hand, maps like Villa or Oregon can feel chaotic at first. Vertical pressure, long sightlines, and multiple rotation options make them harder to control if you’re not familiar with common hotspots. For beginners, it’s best to rotate between simple maps to practice basic positioning, map awareness, and gadget usage, gradually working your way up to the trickier Rainbow Six Mobile maps once you’re comfortable navigating floors, key rooms, and high traffic areas.
People Also Ask
Which Maps are Mobile Exclusive?
The mobile exclusive maps are Summit and Restaurant, designed specifically for fast-paced mobile play with tight corridors and simplified layouts.
Can Bomb Sites Change in Future Seasons?
Yes. While launch bomb sites are fixed, future seasons may introduce new maps or rotate existing bomb sites to keep gameplay fresh and challenging.
Can I Replay Maps Offline or in Training Mode?
Yes, you can practice Rainbow Six Mobile maps in casual or training modes, letting you explore layouts, learn rotations, and test strategies without affecting your ranked status.
Conclusion
Getting to know all the Rainbow Six Mobile locations is like having a secret map in your head. You know where fights will break out, which spots to hold, and how to rotate without getting caught off guard. The more you explore these Rainbow Six Mobile maps, the more rounds you’ll control instead of just reacting. Once you’ve mastered layouts, key positions, and destructible play, every match starts to feel smoother, smarter and way more satisfying. As imple way to grab free rewards and give your tactical jounrey an extra boost is Rainbow Six Siege Redeem Codes, so grab those too.
More guides for Rainbow Six Mobile: