Star Savior Best Teams: Your Ultimate Guide to Crushing PvE and PvP
Reese Avery
|2026-03-24So, you’ve been summoning, grinding through the story, and staring at your roster wondering,“Who do I actually build?”Trust me, we’ve all been there. Star Savior throws a ton of characters at you, but building a team that actually works together? That’s where the real strategy begins.
Whether you’re pushing through the latest Mainstream chapters, tackling the roguelite Journey on Hard Mode, or testing your mettle in the PvP arena, knowing what makes a team tick is half the battle. I’m here to break down exactly what’s working right now. Let’s dive in.
Contents
How Team Composition Works in Star Savior
Before we start naming names, let’s get the basics straight. Every team has four slots: two in the front line and two in the back. Those front-line positions? They take about 80% of the incoming damage, so you absolutely need someone chunky up there.

The general formula that’s proven to work across most content is:
1 Tank + 1 Healer/Support + 2 Damage Dealers (DPS)
But Star Savior is more flexible than that. As the game evolves, we’re seeing some really interesting variations:
- The 2 Tank + 1 DPS + 1 Support comp (known as the “double defender” strategy) is dominating the late-game PvE meta
- The 1 Tank + 3 DPS “kill them before they kill you” approach works great when you’ve got the gear to back it up
- For PvP specifically, the sweet spot is usually 2 DPS + 1 Tank + 1 Support
Also, don’t sleep on elemental matchups. Sun beats Moon, Moon beats Star, Star beats Sun—it’s a classic rock-paper-scissors setup. Chaos and Order are neutral against everyone but strong against each other. This matters a lot for specific boss fights .
LDPlayer - The Best Android Emulator to Play StarSavior on PC
Multi-instance + Sync: Create multiple instance and execute the same operation simultaneously, upgrade your kingdom quickly
Ultra-Wide Screen: Get a full view of the battlefield and seize the strategic opportunities.
Keyboard Mapping: Constructe buildings, place combat units and release skills more convenient and accurately
Landscape: Widen vertical screen by landscape, with a wider field of view and smoother operation for SLG games.
Try LDPlayer now, Enhance your gaming experience
Best Team Archetypes You Need to Know
The Light & Dark (LD) Team — The All-Rounder
If you could only build one team to clear most of the game, this would be it. Light and Dark characters have a massive advantage: they’re only weak to each other and neutral against everything else. That means you can run them into almost any stage without worrying about getting punished by elemental disadvantages .
Core Units:
- Waltz Asherah (Order/Support)— The undisputed queen of sustain. She heals, she supports, and her follow-up attacks let you run tankier lineups without sacrificing damage. If you have her, she’s your anchor .
- Lacy (Chaos/Ranger)— Your dark coverage queen. She brings both single-target and AoE damage, and her passive gives her sustain when she gets hit. She used to bethemeta-defining unit, and while she’s slipped a tiny bit due to power creep, she’s still an absolute monster .

The Flex Slots:
Once you have those two, you’re golden. For the remaining slots, you want at least one Light unit to round out your coverage and then whatever you need—another tank for survivability, an AoE specialist like Luna for wave clearing, or a buffer to amp your damage even further .
LDPlayer: The Best Android Emulator to Play StarSavior on PC!!!
The Double Defender Strategy — Maximum Survivability
This one’s a bit more niche, but man, does it deliver. The idea here is to run two dedicated tanks who also pump out passive damage while keeping your carries alive forever. In a game with no turn limits (for most stages), “not dying” is a winning strategy .
The Non-Negotiable Core:
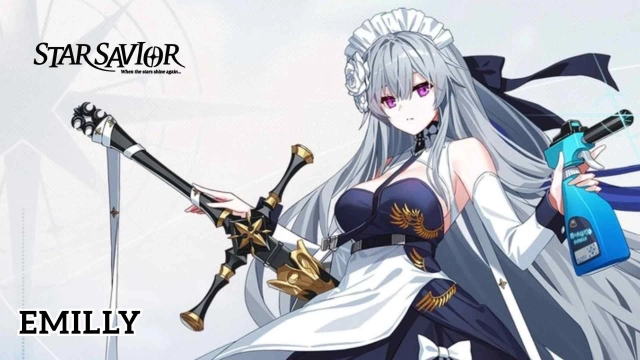
- Emily (Moon/Defender)— She’s widely considered the best tank in the game right now. Her kit provides shields, defense buffs for the whole party, and her ultimate dishes out AoE damage. She’s your front-line wall .
- Ed (Sun/Defender)— Emily’s partner in crime. Together, they abuse the “Careful Tactics” passive, generating extra Nova Force at the start of each turn. This gives your whole team better skill uptime and more damage.

Filling It Out:
- Lacyfits perfectly here as your main DPS because she’s versatile and element-neutral.
- Any strong healercan fill the last slot. Waltz Asherah is the dream, butElisa(Chaos/Support) is a fantastic alternative with her revive mechanic if you need extra insurance .
The Tank + Healer Core — The F2P Friendly King
This is the setup I run on my own account, and it’s probably the most accessible for players who aren’t whaling on every banner. The core idea is simple: you build an unkillable front line and then let your back row do its thing .
The Unbreakable Core:
- Emily (Moon/Defender)— Again, she’s just that good.
- Waltz Asherah (Order/Support)— The best healer in the game. If you don’t have her,Serpang(Sun/Support) or even the freeFrey(Star/Support) can work in a pinch, though you’ll feel the difference.
The Flex Slots:
This is where you get creative. Throw Lacy in there for consistent AoE damage, pair her with Charles or Bunny girl Charles for that sweet crit damage buff, or run a second tank if you’re feeling extra safe. The beauty of this comp is that the two core units do so much heavy lifting that your DPS slots are almost interchangeable .
The Quad DPS / 3+1 — Speed Demon
Sometimes you just want to watch the world burn, and this team delivers. The goal is simple: kill the enemy before they can even take a meaningful turn. It’s high-risk, high-reward, and very satisfying when it works .
How It Works:
- Pure Quad DPS: Run four damage dealers. Units with built-in sustain like Lacy(passive HP recovery) or Bunnygirl Charles(HP recovery on her ultimate) work best in the front slots .
- 3+1 Variation: Run three DPS plus Waltz Asherah. This is usually the smarter play—she gives you a safety net while still contributing damage through her follow-up attacks and buffs.

When It Shines: This comp eats through mob-heavy stages where you can chain kills and reset cooldowns. But fair warning: if you run into a boss with heavy AoE, you’ll get worn down fast without a dedicated tank .
Best Teams for Hard Mode
Once you hit Mainstream Stage 14 and unlock Hard Mode, the game changes. Enemy stats spike, and the Break/Nova Burst mechanics become way less forgiving. You need focused, optimized teams .
Pro Tip: Get your Resonance Level to at least 8 before attempting Hard Mode. The stat difference from Resonance 7 is massive, and Stage 9 is the sweet spot for a clean clear .
Endurance / Boss-Kill Team
Best for: Long boss phases with devastating ultimates.
|
Front |
Front |
Back |
Back |
|
Tank |
Healer |
DPS (Defense Break) |
Burst DPS |
|
E’ed |
Frey |
Smile |
Kyra |


Smile is arguably the strongest DPS for Hard Mode right now because her built-in defense break during Break windows is the primary damage pattern. Pair that with Ed soaking hits and Frey’s shields, and you’ve got a team that outlasts almost anything .
Speed / Tempo Team
Best for: Stages with enrage timers or multiple fast enemies.
|
Front/Back |
Front/Back |
Back |
Back |
|
Speed DPS |
Nullify Support |
Defense Break |
AoE Clear |
|
scarlet |
Serpang |
Smile |
Luna |


High speed and action gauge manipulation let this team act multiple times before enemies get a turn. You’ll deplete Toughness and enter Break phases way faster than normal .
Control / Debuff Team
Best for: Enemies with strong buffs or high resistances.
|
Back |
Back |
Back |
Back |
|
AoE/Debuff |
Control DPS |
Debuffer |
Revive Healer |
|
Luna |
Kyra |
Dana |
Elisa |


This team layers debuffs, stuns, and status effects to reduce enemy damage before landing the killing blow. Elisa’s revive is clutch here because this setup can be a little glass-cannon at times .
Star Savior PvP Tier List: March 2026
PvP is a different beast entirely. You’re fighting against real people who’ve optimized their teams, and trust me, your maxed-out PvE squad might not cut it. SR characters are generally pretty bad in PvP, so focus your resources on your SSRs .
Star Savior Tier List and Reroll Guide for the Best – March 2026
S Tier — Top of the Food Chain
|
Character |
Element |
Role |
|
Hilde |
Sun |
Defender |
|
Emily |
Moon |
Defender |
|
Bell Rhys |
Star |
Ranger |
|
Bunnygirl Charlotte |
Sun |
Assassin |
|
Elisa |
Chaos |
Support |
|
Bunnygirl Claire |
Moon |
Striker |
|
Haydee |
Star |
Defender |
|
Kyra |
Sun |
Assassin |
|
Lacy |
Chaos |
Ranger |
|
Luna |
Order |
Caster |
Journey Mode and Endgame Tips
Once you hit the Journey on Hard Mode, you need to think beyond just your character roster. Here’s what separates the players who clear from the players who wipe:
- Arcana Stacking: Stack multiple Arcanas of thesametype rather than mixing. Three Strength-type Arcanas on your DPS is the most efficient setup. Push your main damage stat to 1,250 before the end of the run .
- Training Priorities: Focus on Strength, Constitution, and Endurance. Only invest in Focus or Protection when you have three or more queued at once. Triggering Hypersensitivity training is a huge win when you see it .
- Condition Management: Keep your Saviors in peak condition throughout the run. Letting condition drop will silently wreck your stats and turn winnable fights into losses .
- Shop Usage: The Journey Shop isn’t just for emergencies—use it actively to complete equipment sets and unlock Special Potentials. This is a major mid-run power spike that too many players ignore .
The Hard Mode Combat Loop
The core Break-and-Nova loop applies to Hard Mode, but execution is everything:
- Activate your tank’s shield or mitigation before the boss’s telegraphed ultimate
- Apply defense-down and debuffs immediately after
- Focus all DPS on Toughness depletion—hold your ultimates
- Trigger your main DPS ultimates and Nova Burstinsidethe Break window for the multiplier
- Sustain through the follow-up AoE with your healer, then reset
Golden Rule: In Hard Mode, patience beats aggression. If you fire your ultimates outside the Break window, you’re going to have a bad time.

Final Thoughts
The meta in Star Savior is always shifting, especially with new banners and the recent CounterSide collab shaking things up. But the fundamentals hold: build around a strong sustain core, pay attention to elemental matchups for specific fights, and don’t be afraid to experiment with different comps based on the content you’re facing .
From there, keep an eye on those tier lists, invest your resources wisely, and remember—sometimes the best strategy is just to survive long enough to watch your enemies crumble.
Now go out there and save those stars, Savior!